You would create a Variation Product when your item has different colours, sizes or various different attributes for the one item, ie a top that comes in small, medium and large, as well as red, blue and white. Each variation product must have at least one attribute for the customer to choose from. If you don't believe you have any attributes for this product, then, choose a shippable or non-shippable product type.
First you need to set up your Variations and Attributes so that you can choose from these lists when you set up the product.
- Go to your administration menu and choose from eCommerce Configuration - Product Variations - Attributes (note do not change anything in Settings, or Variations Products List).
- There may already be some items in the list of Attributes - Scroll to the bottom and type in the blank field, an Attribute name that will make sense. ie Size.
- Choose Primary
- Don't worry about changing the Filter box unless you get special instructions from the Aspedia Support team
- You Must Reorder your Primary Attributes above your Secondary Attributes, do this by dragging the cross to the left of the Attribute to it's correct location
- Click Add Value
- Save Your Page after you've re-ordered.
Note, The order that you put your attributes in this list - will be the order that your customer will choose when they are purchasing your product.
Do Not Add another Attribute at put it above Primary Attributes that are already in the list once you have already created some products. Only add further Primary Attributes below the existing ones. This could affect the existing products that you have already created.
Now you need to add the Values that belong to this Attribute - click on Values in the same line as the Attribute you want to add values
- Enter the first Value in the blank field ie Small, or medium, or 1 Litre, or 500ml
- If you are going to ask for more dollars for this value, enter the increase in 'Price Adjustment' ie Gold might cost 20% more than Silver or XXL might cost $1 more than small. Just add the increase on the base price which you will include when you set up the product. If you aren't charging more - leave this field blank
- If you want to restrict some customers from seeing some of the attributes, then you can choose who will see it here - if you want to sell to everyone - leave it blank.
- Click on Add Value
- Keep repeating this until you have entered all the values you expect you will use over all your products. ie Small, Medium, Large, XL, 8, 10, 12, 14, 16
- Then Click on Save
Note, The order that you put your values in this list - will be the order that your customer will see in the drop down when they are purchasing your product. You can come back and add more Values later.
Now you will create your product
- From the administration menu choose 'Create Content'
- Scroll down to 'Product'
- From the list of products choose Product Variations
- If you want your item to appear in more than one category ie in tops as well as specials, hold down the Ctrl Key on your keyboard while you select each category with your mouse. (The categories should already be set up by Aspedia as per your instructions when designing your website).
- To upload an image, click on browse and choose from your computer, find the image and either double click or click and 'open'. Then click on Upload.
its best to have all your product images ready in one section on your computer and resized to what you require for your website. Read more on resizing an image - Complete all the required fields including 'Sell Price'. This price should include the gst.
- You Must remember to tick Hidden in the 'Add to cart' link - as the cart will create one for the attributes (you only need to do this for Variation Products)
- If you want to manage how many items you have with inventory control - then tick the 'Manage Stock' box.
- The Product Weight and Size fields are mainly for your reference and are not required for you to complete. If you are using a complex shipping method that requires weight and size, there will be other fields you will have to complete with that module. You will be given separate instructions for these fields.
- If you are not sure about the fields and whether you require them, such as 'renewable schedule' and 'priority' - leave them as the default. We will give you instructions if you need to choose these.
- Scroll down and save your product
 After you save your product you will need to add in the variations - you will see an error signal until you add your first attribute and the values to the product (this is normal).
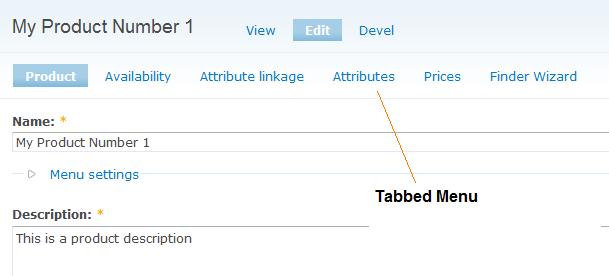
- The first time you are setting up a product the system will automatically take you to the correct page to add your attributes. If you need to go back and edit your attributes, you will have to choose from the product menu 'Attributes' which is tabbed along the top of screen.
- Tick each box of the attributes that you require for this product.
- Scroll down and click the save button.
- Now click on 'Availability' from the tabbed menu
- This is where you will set up which values from each attribute are required for each product. First check what stock you do want to set up
- From your first attribute choose either all or one of the fields
- If you have a second attribute choose either all or one of the fields etc
- Don't worry about 'Filter Selected' unless you have been given specific instructions from the Aspedia Support Team
- Click 'Add Selected'
- Repeat this until all your values have been chosen all the items that you want to sell for this product.
- If you have combinations of attributes that are not available, you can remove them from the list of available configurations before your save your page so customers cannot attempt to purchase them.
- If one or some of your products are going to cost more or less than your default price - this is another area where you can set what they would cost - this is an override price, not a percentage or dollar increase/decrease
- When you have all your items right - Scroll down and click save
- If you would like to view your product - click on 'View' in the menu above the tabbed menu. You can continue to Edit your product if required by clicking on the edit button.